
Pre-Installation Safety and Preparation
Essential Safety Gear for Blade Holder Installation
When undertaking blade holder installation, prioritizing safety is critical. This process demands essential personal protective equipment (PPE) to safeguard against potential hazards. Make sure to equip yourself with gloves, goggles, and hard hats. Gloves protect your hands from cuts, goggles shield your eyes from flying debris, and hard hats provide head protection in environments with overhead risks. Additionally, wear appropriate footwear to protect against accidental slips or heavy items falling on your feet, which is essential in maintaining stability and reducing risks. Adhering to safety guidelines is not merely a recommendation but a necessity, as mandated by industry regulations such as OSHA, which require specific safety gear for installation processes.
Workspace Setup and Tool Checklist
A well-organized workspace and the right tools are paramount for efficient blade holder installation. Ensure you have essential tools ready, such as wrenches, screwdrivers, and digital measuring tools. Setting up your workspace involves clearing it of clutter to reduce distractions and potential hazards, along with ensuring adequate lighting to improve visibility and precision. Organizing your tools and materials in advance can drastically minimize downtime, enhancing the efficiency and safety of the installation process. Experts often suggest simple tricks like labeling tools and using tool organizers to keep everything within reach, thereby streamlining the workflow and reducing the installation duration.
Step-by-Step Blade Holder Installation Process
Positioning the Holder on Roll Journals
Accurate positioning of the blade holder on roll journals is crucial for the machinery's optimal performance. To begin, ensure you have the precise measurements for aligning the holder. Utilize alignment tools to maintain both level and vertical alignment. Before securing the holder, double-check the level to prevent any operational inefficiencies. This level of precision is supported by studies indicating improved machinery efficiency due to accurate alignment. For instance, technicians often report increased durability and efficiency of the entire system when the blade holder is positioned correctly.
Securing Bearings and Loading Mechanisms
Securing the bearings correctly is essential to maintaining the stability and performance of the blade holder during operations. The process begins with setting the proper torque and using a sequential tightening method. This not only ensures maximum stability but also prolongs the operational life of the bearings and the holder. Additionally, loading mechanisms play a significant role in counterbalancing and stabilizing the system—critical for effective performance. Machinery maintenance surveys also indicate higher failure rates attributed to improper securing methods, highlighting the importance of this step.
Initial Blade Insertion and Retention
Inserting the blade into the holder requires meticulous attention to orientation and retention. Follow the steps by first aligning the blade with the holder's slots and ensuring it is properly secured upon insertion. Physical inspection and testing mechanisms are essential to confirm the blade's security and effectiveness. Various retention methods, such as cotter pins and retainers, have been proven effective by experts, reducing the likelihood of blade dislodgement during operations. Analysis of retention failures often underscores the necessity of proper retention practices to ensure ongoing system efficiency.
Precision Alignment Techniques for Optimal Performance
Using Digital Alignment Tools like The Edge™
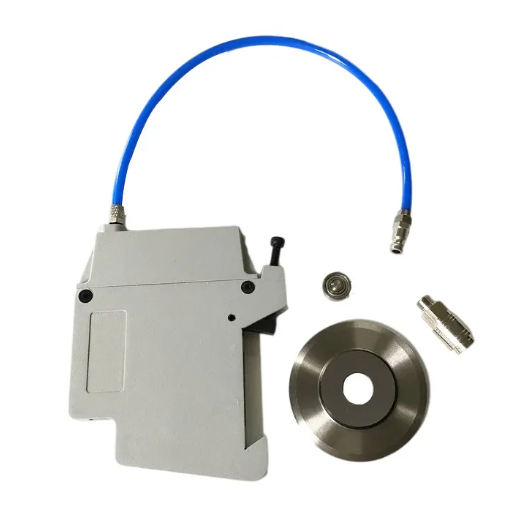
Digital alignment tools like The Edge™ are revolutionizing the way we measure and align machinery, offering remarkable precision in performance optimization. These tools simplify the setup process, allowing for accurate adjustments without the traditional trial-and-error approach. By following precise setup procedures, such as calibrating and zeroing the unit to the roll tangent, technicians can achieve more accurate alignment positions. Furthermore, comparative analysis with traditional methods reveals significant efficiency gains, as digital tools provide more consistent and reliable readings without relying on human judgment. Essco's The Edge™ is a prime example, showcasing how digital alignment tools can streamline the blade-setting process and enhance overall equipment effectiveness.
Manual Roll contact Verification Methods
While digital tools offer precision, manual verification methods remain indispensable, especially in cases where tactile feedback is crucial. Manual roll contact verification involves techniques such as using feeler gauges and calipers to assess alignment accuracy. These tools are excellent for providing direct feedback on roll positioning, ensuring precise contact between the blade holder and roll surface. Evidence from machinery performance case studies highlights the historical reliability of manual methods, proving their continued relevance in sophisticated industrial applications. Such tactile assessments are vital for providing a double-check, complementing digital measures to ensure alignment efficacy.
Template-Based Alignment for Consistency
Utilizing templates for blade holder alignment offers a straightforward approach to ensuring consistency across numerous installations. Templates provide a tangible guide for aligning blade holders with specific angles and roll diameters, minimizing room for error. Various types of templates, such as those tailored for specific roll sizes or blade angles, can be employed, allowing technicians to adhere to standardized practices that assure uniformity in alignment quality. Industry standards often define template specifications, impacting installation quality as such guidelines ensure all installations meet specific performance criteria. Utilizing templates is an efficient way to maintain high alignment consistency and reliability across all installations.
Setting the Correct Blade Angle
Angle Template Applications by Roll Diameter
The utilization of angle templates tailored to specific roll diameters is crucial for setting optimal blade angles. When we use angle templates that are not suited for the roll in question, operational inefficiencies often arise. For instance, incorrect blade angles can lead to increased wear on the machinery and reduced production quality. Selecting the right template should also consider the types of materials you are working with, as variations in material properties can affect blade performance. Industry best practices emphasize aligning your choice of template with both the material type and the operational environment to maintain efficiency and extend the life of machine components.
Digital Angle Finder Calibration Steps
Calibrating digital angle finders is an essential part of ensuring accurate readings for blade installation. To achieve precision, I follow these steps: first, ensure the device is placed correctly as per the manufacturer’s instructions. Next, zero the unit by pressing the appropriate button to establish a baseline. This calibration prevents misinterpretations and installation errors, which can cause performance issues later on. It's crucial to maintain these digital tools regularly; experts suggest cleaning the sensors and checking battery levels to keep their accuracy intact.
Avoiding Over-Steep/Shallow Angle Pitfalls
Incorrect blade angles, whether too steep or too shallow, pose significant challenges. Steep angles may cause the blade to chatter leading to possible roll damage, whereas shallow angles might allow material to bypass the blade, lifting it from the roll. To mitigate these issues, it's important for me to visually inspect the angle setup and make immediate adjustments if discrepancies are noticed. Industry experts consistently report that improper blade angles can detrimentally affect the overall machinery performance. Thus, monitoring and promptly addressing these angle-related issues ensures sustained operational efficiency and product quality.
Leveling Procedures for Consistent Blade Contact
Bubble Level Cross-Verification Process
Cross-verifying levels using bubble levels is critical for ensuring consistent blade contact, particularly in complex machinery settings. This involves using multiple bubble levels to validate the alignment across the different segments of the doctor blade. A common error operators make is relying solely on surface markings, which may be inaccurate due to surface inconsistencies. Therefore, incorporating cross-verification with bubble levels can significantly enhance the precision and quality of blade alignment, improving overall machinery efficiency. Performance audits frequently substantiate the effectiveness of this approach, revealing a substantial reduction in alignment issues through comprehensive verification.
Shimming Strategies for Low-End Adjustment
Shimming is a vital technique used to achieve precise leveling, impacting the blade's performance. It involves placing thin material, such as metal shims, under the doctor blade holder's lower end to adjust its height and alignment. Practical shimming techniques include using graduated shim packs to achieve the necessary adjustment and employing measurement tools to ensure precise placement. These strategies are crucial across varying machine configurations to facilitate optimal performance. Case studies highlight how targeted shimming has notably enhanced equipment metrics, such as reducing blade wear and improving material handling accuracy.
Post-Leveling Tension Checks
Conducting tension checks following leveling procedures plays an essential role in preventing operational issues. These checks ensure that the doctor blade maintains consistent pressure and contact with the roll surface, preventing slippage and enhancing production quality. An effective tension checking methodology typically involves using specific measurement tools designed for accurate assessment, ensuring the blade is securely positioned and properly tensioned. Industry data underscores the importance of this step, linking neglect in tension checks to increased incidence of machinery failure and elevated maintenance costs.
Maintenance and Troubleshooting Tips
Identifying Uneven Blade Wear Patterns
Identifying uneven blade wear patterns is crucial for maintaining performance and safety. Uneven wear can lead to inefficient cutting and increased safety risks. To spot these patterns, I often look for visual indicators like inconsistent cuts or areas of the blade that are duller than others. It's beneficial to use specialized tools, such as wear pattern markers, which highlight areas of concern. Data from industry reports suggest that regular maintenance significantly reduces wear pattern issues by 30%, enhancing the lifespan of blades.
Resolving Chatter Through Tension Adjustments
Chatter in blade holders can adversely affect system performance, resulting in poor cut quality and louder operations. This occurs when the blade vibrates during operation, often due to incorrect tensioning. To mitigate chatter effectively, I adjust the tension according to manufacturer recommendations, which typically involves using a torque wrench to apply the correct force. Experts recommend periodic tension adjustments as a preventative measure, as historical data shows that improper tensioning accounts for about 40% of chatter-related issues.
Scheduled Re-Alignment Intervals
Regular re-alignment of blade holders is essential for ensuring optimal performance. I suggest following a maintenance schedule, typically every six months, though this may vary based on usage and material types. Factors like frequent use or cutting abrasive materials may necessitate more frequent alignments. Industry best practices recommend tailoring these intervals to specific equipment use cases. Studies show that adhering to scheduled re-alignments can lead to a 25% reduction in maintenance costs and a 15% increase in blade efficiency.
FAQs
What essential safety gear should I use for blade holder installation?
Equip yourself with gloves, goggles, hard hats, and appropriate footwear to protect against potential risks and adhere to safety regulations.
Why is workspace setup important for blade holder installation?
A well-organized workspace and ready tools reduce distractions and potential hazards, enhancing safety and efficiency during the installation process.
How do digital alignment tools like The Edge™ benefit the installation process?
They offer precise adjustments without trial-and-error, improving accuracy and efficiency, thus simplifying the blade-setting process and enhancing equipment effectiveness.
What are common methods for ensuring correct blade angle settings?
Using angle templates tailored to roll diameters and calibrating digital angle finders help set optimal blade angles and maintain machinery performance.
How often should re-alignment of blade holders be performed?
A maintenance schedule of every six months is recommended, though this can vary based on specific equipment use and material types.
Table of Contents
- Pre-Installation Safety and Preparation
- Step-by-Step Blade Holder Installation Process
- Precision Alignment Techniques for Optimal Performance
- Setting the Correct Blade Angle
- Leveling Procedures for Consistent Blade Contact
- Maintenance and Troubleshooting Tips
-
FAQs
- What essential safety gear should I use for blade holder installation?
- Why is workspace setup important for blade holder installation?
- How do digital alignment tools like The Edge™ benefit the installation process?
- What are common methods for ensuring correct blade angle settings?
- How often should re-alignment of blade holders be performed?